New Coupon setup in the Online Options site
In the 3.102 update, you can add coupons to the Online Options site using the new Add a Coupon button in the Online Option’s Coupon screen under Sale. This means that you can add coupons anywhere at anytime as long as you have an internet connection and a browser.
Note: Coupons created via your local terminal running POSExpress in Options will display in the Online Options. For directions on how to do that, click here>>
To add a coupon
-
Go to the Online Options site and log in as an admin or with the proper permissions.
-
From the Main menu, select Sales | Coupons. The Coupon Setup screen displays.
-
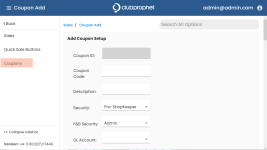
Click the Add New Coupon button. The Add Coupon Setup screen displays:
Note: You do not need to enter a Coupon ID; one will be assigned to this field by the system.
-
Enter letters, numbers, or a combination of both for your customers to enter in the Coupon field in order to redeem this coupon online. Make it something simple to type in and also descriptive and easy to remember, for example, 50GolfWed. Don’t use spaces as a rule.
-
Enter a description of this coupon into the Description field.
-
From the Security drop-down field, select the security on who is allowed to work with coupons
Note: See User Rules for more information.
-
Select the F&B Security drop-down and select the security option for your F&B module if applicable.
-
From the GL Code drop-down, select the GL code needed for this coupon for proper reporting.
-
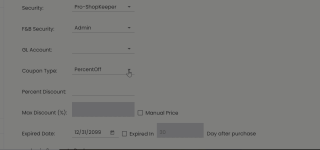
In the Coupon Type drop-down field, select the type of coupon this will be. These selections are hard-coded into the system: PercentOff, AmountOff, BuyOneFreeOne, BuyXFreeX, GuestPass, BuyOneFreeLowestOne. Depending on what you select determines what displays next.
-
When selecting:
-
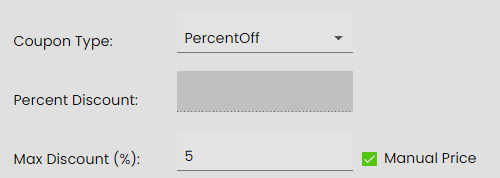
PercentOff for allowing a percentage to discount the item’s price - the Percent Discount and the Max Discount ($) field & Manual Price checkbox displays. Do one of the following in these fields:
-
-
Enter a percentage in the Percent Discount field.
-OR-
-
Select the checkbox and then enter a maximum manual percentage price for the item. Note: The item must be set up in Inventory as an item that allows you to enter the price at the time of sale. See the Manually Priced topic for more information.
-
-
AmountOff for allowing a dollar amount discount on the item’s price - the DollarDiscount and the Max Discount ($) fields & Manual Price checkbox displays. Do one of the following in these fields as instructed above for PercentOff section.
-
BuyOneFreeOne for allowing a “buy one get one free” discount - the expiry fields display. See step 10 for more information.
-
BuyXFreeX for allowing a “buy a certain amount; get a certain amount free” discount - the expiry fields display. See step 10 for more information.
-
GuestPass for allowing a free guest pass for golfing - the expiry fields display. See step 10 for more information.
-
BuyOneFreeLowestOne for allowing a customer to buy an item and receive an item free that has the lower price discount - the expiry fields display. See step 10 for more information.
-
-
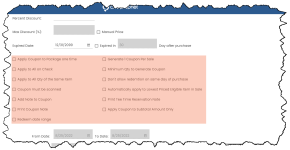
When the Expired Date: Expired In Day after purchase - Expired Date field and Expired In checkbox display. Use one or the other by selecting a date from the field -OR- selecting the checkbox and typing in a number for the “Day after purchase” for the coupon to expire.
-
Select all the checkboxes that apply to this coupon:
Note: The Coupon Note is attached to the Add Note to Coupon checkbox. Select the checkbox first then you can add a note that displays on the receipt when the coupon prints.
-
In the Coupon Filter section, first, select one of the following tabs:
-
Member Class
-
Sales Categories
-
Products
Then select the needed checkboxes that apply to your situation.
Note: Select the Select All button if you want all the checkboxes selected in the Member Class or Sales Categories section.
-
-
In the Store section, select all the stores to which this coupon would apply.
-
In the Course section, select all the stores to which this coupon applies.
-
Select the Restrict by Day and Time checkbox if desired. The By Tee Time and By Sale Time radio buttons are now active. Do one of the following:
-
To restrict by tee time, select the By Tee Time radio button, select the day checkboxes set the From and To times, then click Add button.
OR
- To restrict by sale time, select the By Sale Time radio buttons, To restrict by tee time, select the The By Tee Time radio button, select the day checkboxes set the From and To times, then click Add button.
-
Select Save in the lower right corner when you are done. You may have to scroll down to the bottom to see the Save button.
To use the coupons
-
Have the customer log onto Online Reservation v5.
-
Book tee time.
-
Enter the coupon code in the field.
-
Finalize and pay for the tee time.


